It’s been one of those days. Thirteen of them to be exact. You know the kind, where things move so quickly on something you never thought would happen, but it did, and the end is near, but you can’t quite remember how you got there? It’s broken my brain.
I had a post idea in mind and took the photos, except I can only find half of them and all the windows in our apartment face east, so the lighting is too intense first thing in the morning to retake the missing photos.
As a result, I ate frozen cool whip right from the container for lunch yesterday.
In the last few days, I’ve said the phrase, “If you don’t get up off the ground I’m going to start hitting you in the face with this bag of poop” more than you should ever have to say in your lifetime. Which is pretty easy to do, because you should never have to say anything that involves hitting someone in the face with a bag of poop.
My hair is also up in this weird side french braid thing; only I’m not good at french braiding and my hair isn’t very long, so it looks more like a cross between Jem, Elsa, and Merida when she first wakes up. Which sounds kind of cool in theory, but a lot of bad ideas sound cool in theory and not in practice.
So for anyone who is new here, what does any of this have to do with my favorite tools for learning hand lettering? Nothing. Except that all of those things combined have put me in a perpetual state of working with different hand lettering tools to try and make my brain come down from cloud 10.
Now, I’d like to preface this by saying that I am not some amazing artist at hand lettering. I am however interested in learning hand lettering and want to become better, and if you are in the same place, this is the post for you!
HAND LETTERING TOOLS FOR BEGINNERS (LIKE ME)
TOOL #1
Find a brushy font you like (Creative Market is a good place) and make yourself a practice sheet. I typed out a few lines of a, a few of b, and so on. You will use this to get the feel of the letterforms and the pen pressure. We are aiming for muscle memory!
TOOL #2
Get some inexpensive (you will be going through a lot of it) semi-transparent paper that is for brush markers. I like this one because it doesn’t bleed and you can place your printed practice sheet under it to trace.
TOOL #3
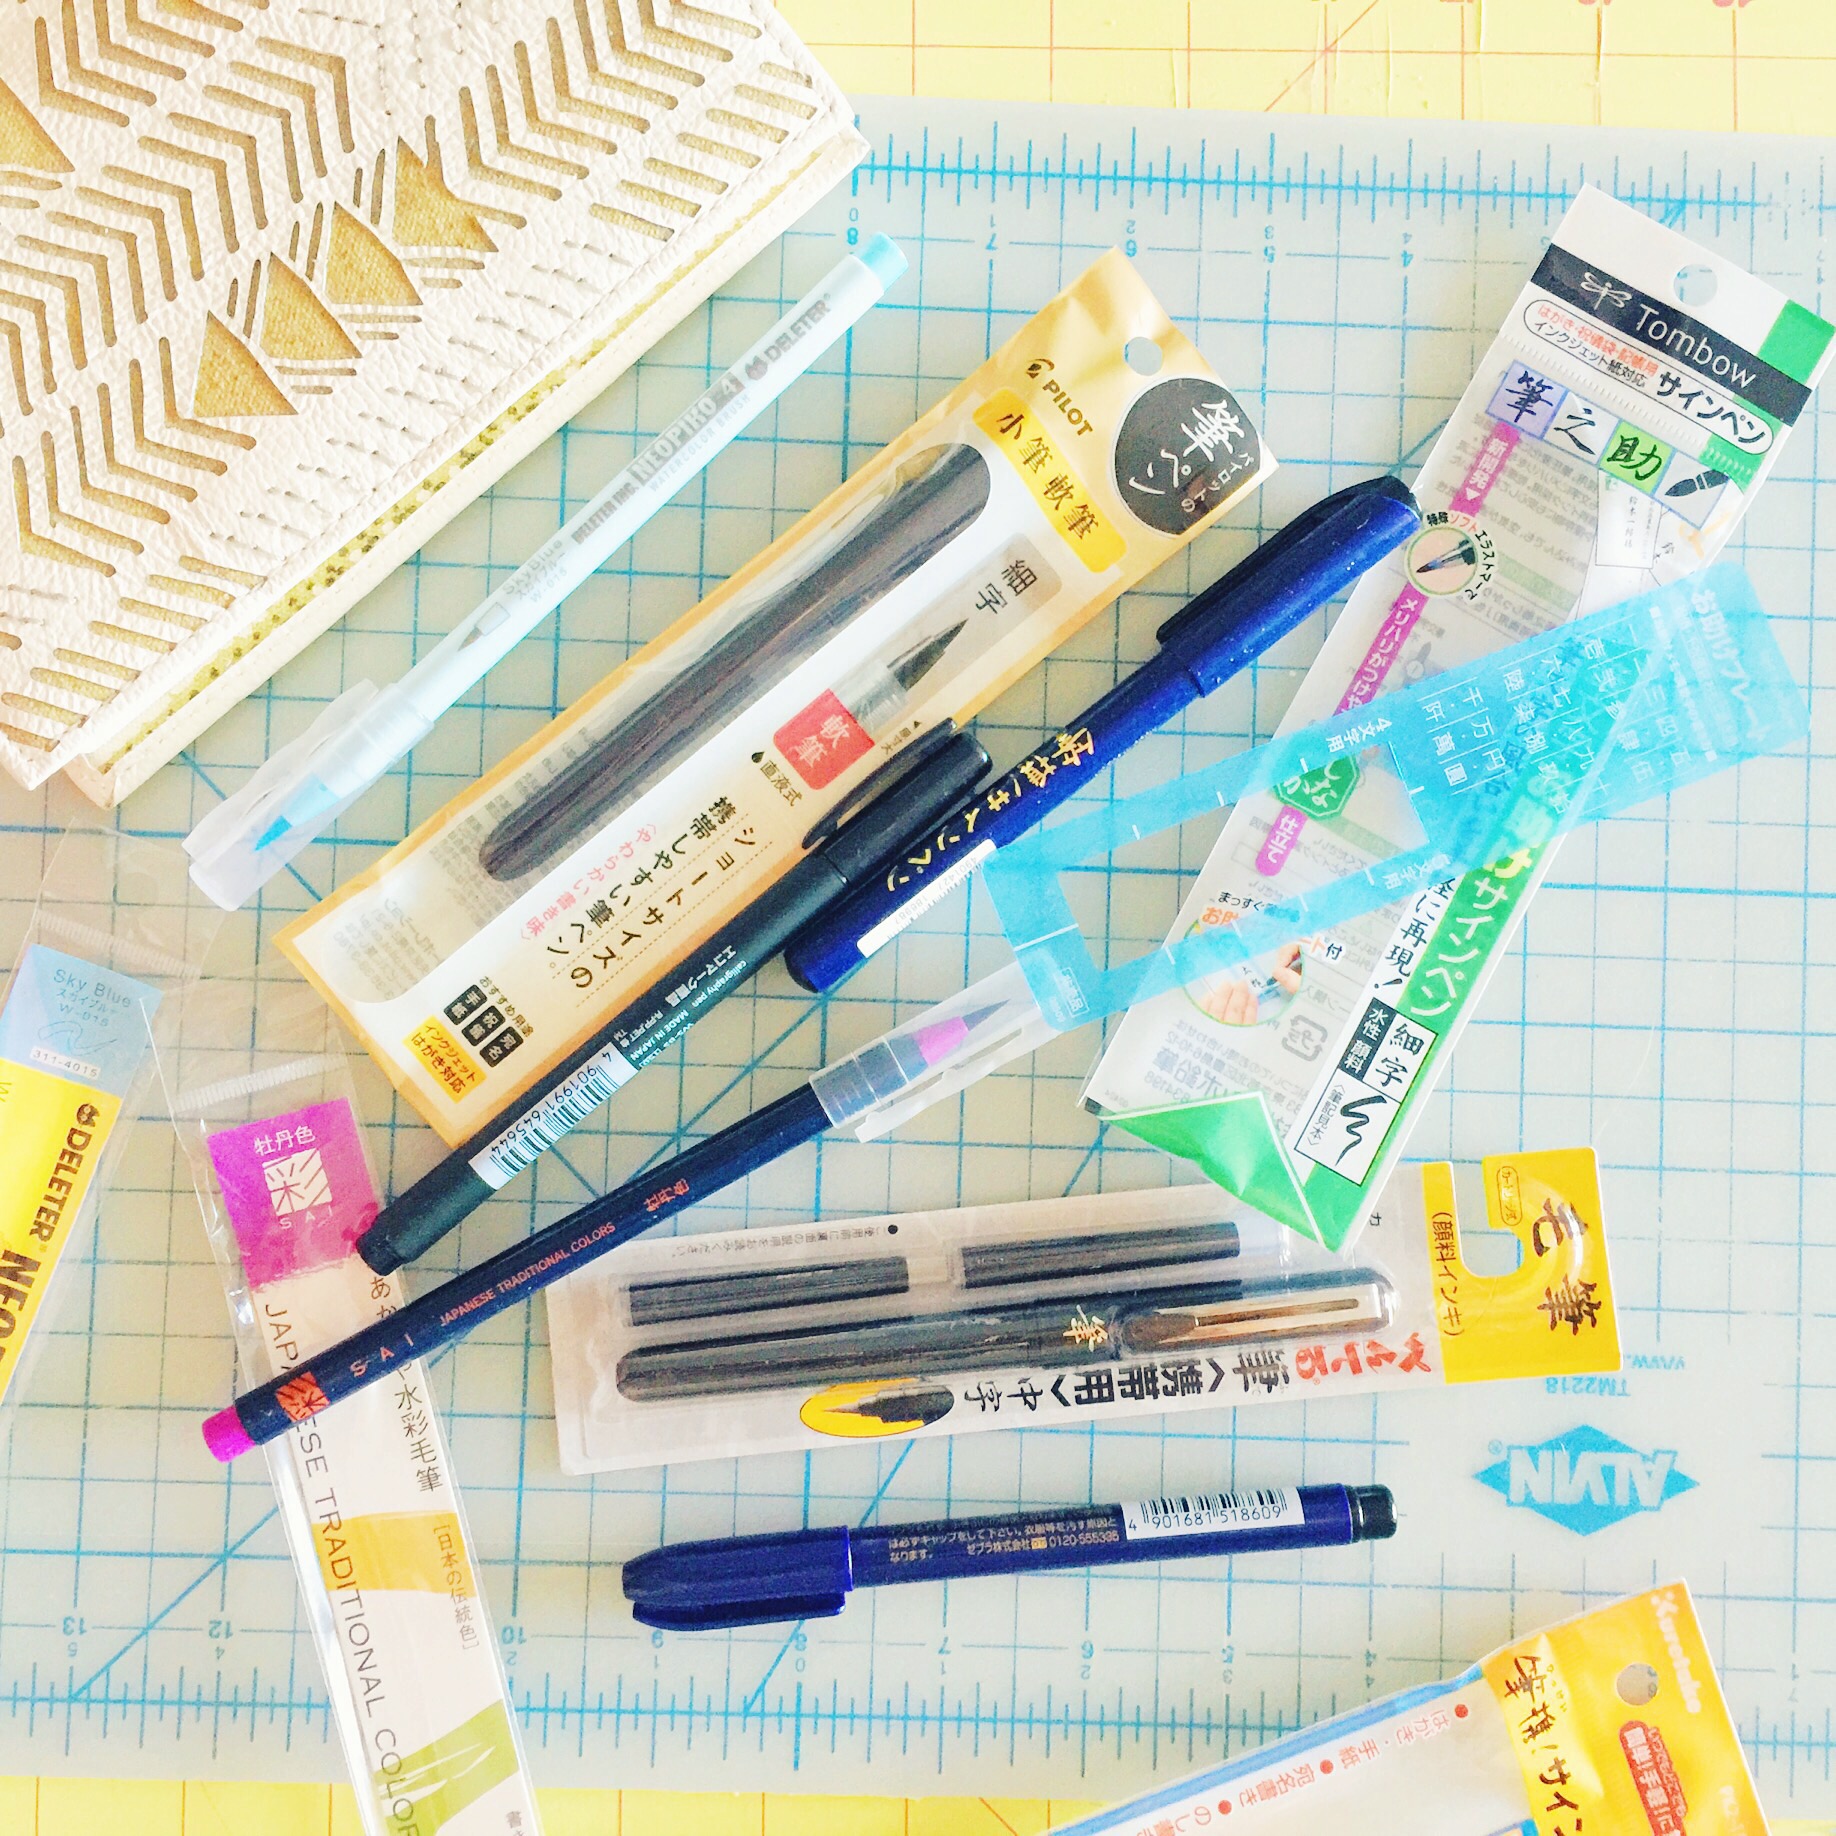
Pens! The number one hand lettering tool. Obviously, this is subjective, but after using all sorts of different pens, I’ve found that for practicing shapes and pressure, this pen is the easiest to control. It has a felt tip that yields to pressure, but it’s still easy to keep your strokes consistent. You could also buy a set of pens. I purchased this set so I could try out different types of brush pens to see what I liked best.
PRACTICE!
Next, trace letters over and over and over again until you feel you have the motion down. Then take off the training wheels and start writing on your own. They will most likely look awful at first, but that’s okay. Keep writing, take a little break, retrace a few, and then write some more. A lot more.
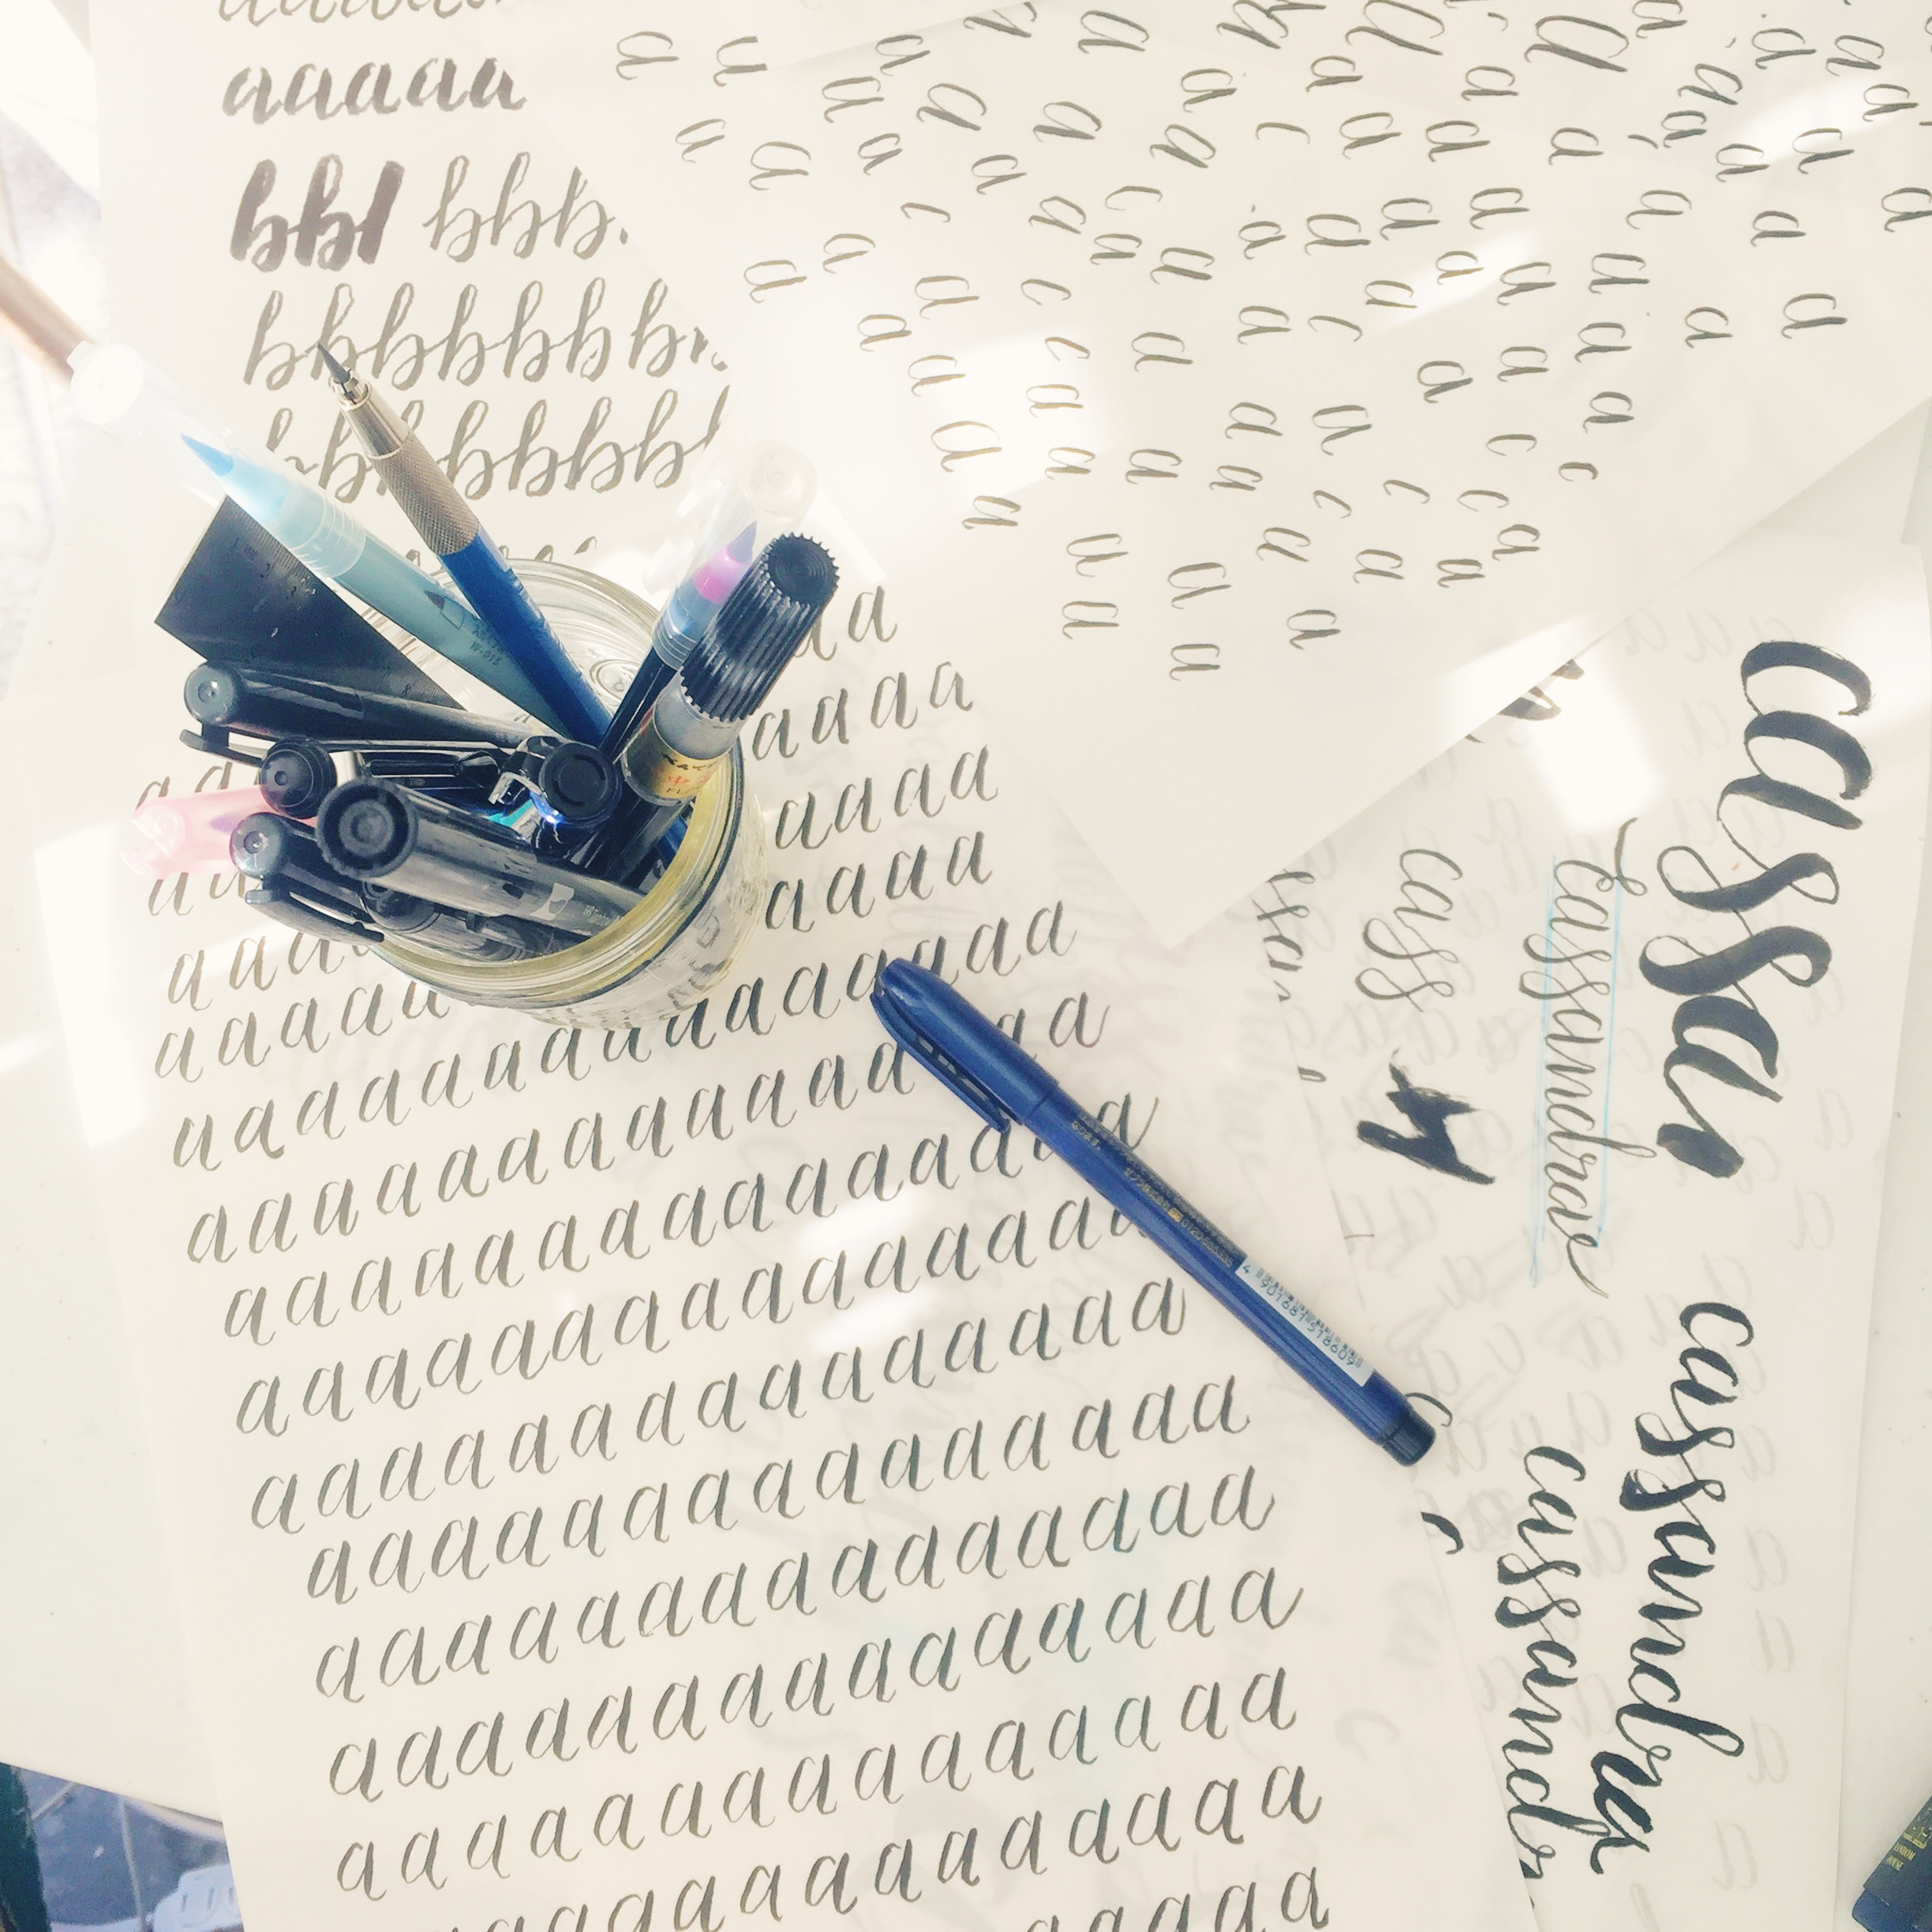
Like, seriously a lot. Enough that your husband falls asleep on the couch for two hours and wakes up, and you haven’t moved and are still writing the same letter a lot.
So that is where I am with my hand lettering practice! Do you have any tips or favorite tools? Let me know in the comments below!
xx
PS: JetPens did not sponsor this post. I just love them because they have all the hand lettering tools of your dreams!