
CHRISTMAS. There, I said it. I know, I know, it’s only March, but I have an excellent reason. Andrew and I have decided to make the majority of the Christmas gifts we are giving this year, like this (spoiler alert) Triangle + Tassel Necklace. It is something we often try and do but don’t think of until the end of October and, well, I’m sure a lot of you know how well starting Christmas present making at the end of October goes. SO, I’ve finally gotten my act together and have started. That’s why I’m talking about Christmas already. That and the other day when I got in my car in the garage, my phone which will often connect to iTunes instead of Spotify when I don’t have much signal, and always plays Taylor Swift automatically because my phone is a magical creature, started playing Christmas music instead. Andrew is probably going to say that it happened because I must have been secretly listening to Christmas music last. Except he should know by now that never in my life, have I SECRETLY listened to Christmas music, even if it is March. It’s a sign you guys. A sign that it is okay for me to talk about Christmas nine months in advance so long as I’m doing it to give you ideas to make presents for people. Also that I love Christmas and was probably going to talk about it anyway even if my phone hadn’t randomly played Mariah Carey Christmas music.
My phone is a magical creature that auto plays #tswift when I get in my car. Oh and something about crafts.Click To TweetOkay, I just watched that video again and did anyone else get a weird voyeur/stalker vibe from it? And why did she get a bunny? And was the bunny in that box she’s shaking a few seconds later? Then she gets TWO bunnies and a dove?! All with a motion sickness inducing kaleidoscope filter? SO MANY QUESTIONS, MARIAH!
Back to this necklace. It’s super easy to make and customize with all sorts of shapes and different colored paint and thread. It does take a little bit of time, this isn’t a project you can complete in an afternoon, but most of that is drying time. You can find all of the supplies at your local craft store, and you will have enough paint, clay, and thread to make multiple necklaces. The only special tool I recommend would be a small pair of needle nose pliers, which makes attaching the jump rings and clasp a million times easier. Are you ready?
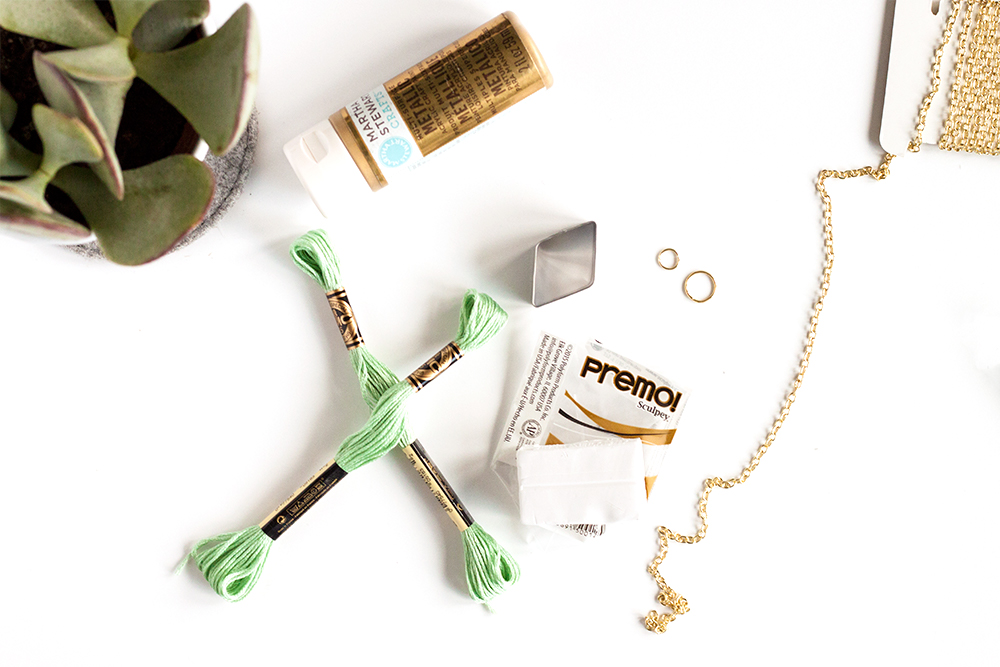
SUPPLIES
One 2oz block of white oven bake clay
Diamond cookie cutter
White spray paint (I used a glossy finish)
Gold craft paint
Jump rings in assorted sizes
Embroidery floss
Length of chain, however long you want your necklace to be
One spring hook closure
Paperclip or toothpick
EXTRAS
Needle nose pliers
Needle
Washi tape
Paintbrush
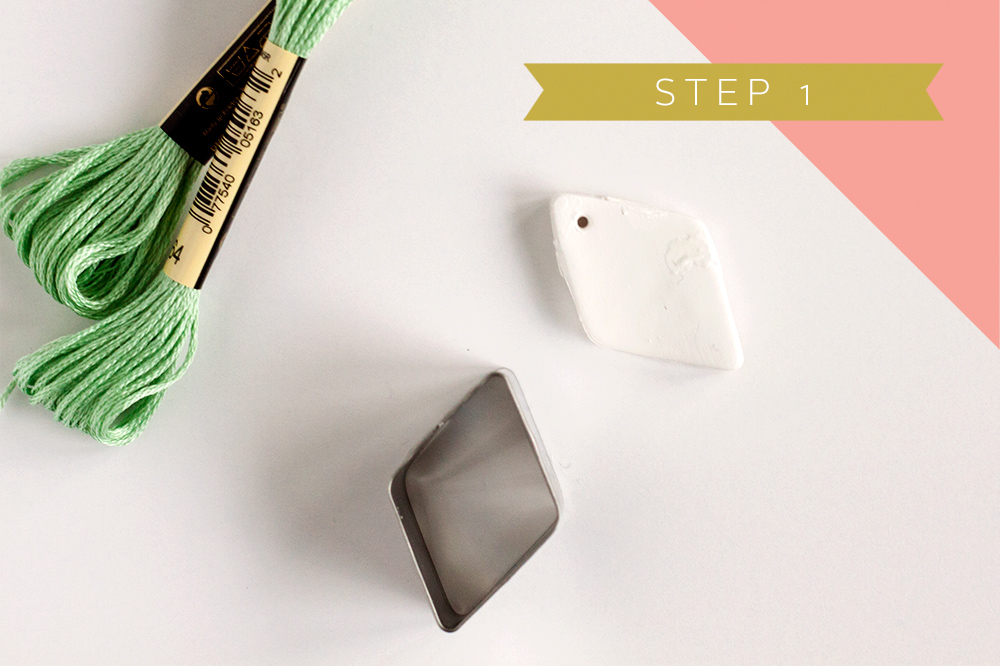
STEP 1
Roll out clay to 1/4″ and cut out diamond shapes (you will be able to get more than one). Take a toothpick or the end of a paperclip to create a hole near the top, just make sure it is large enough for the jump ring to fit through. Bake clay according to instructions on the package and allow to cool.
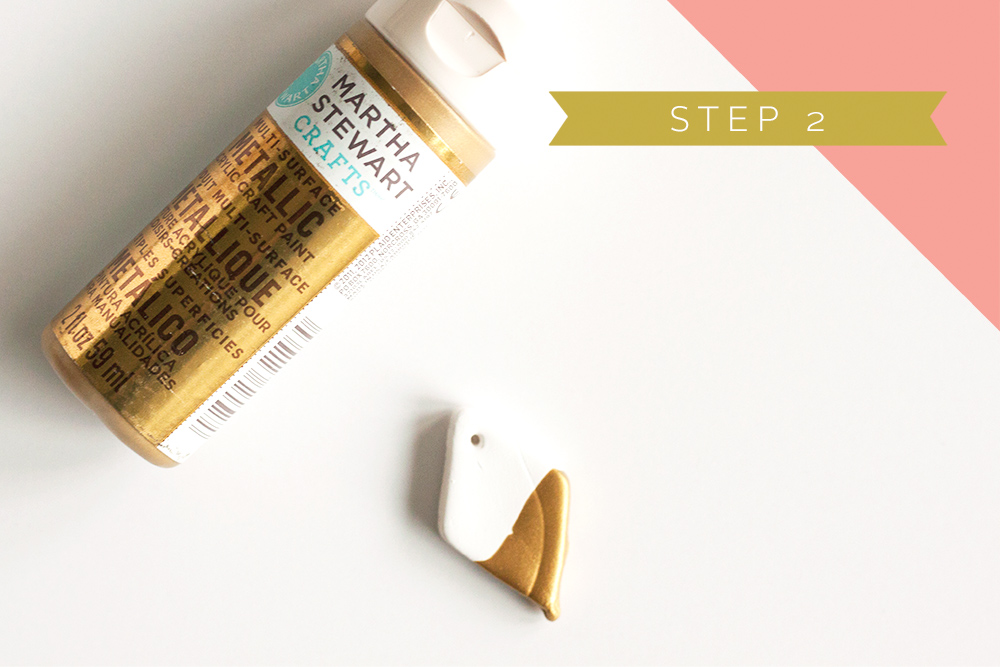
STEP 2
Paint each side of the diamond with white spray paint (not pictured), allowing each side to dry completely before painting the other. You will need one or two coats depending on your brand of paint; I used two. For the gold paint, you can either dip the clay or mark off the part you’d like to paint with washi tape and paint it on with a paintbrush. Here I used the dipping method, but will probably use the washi tape method next time. To allow the paint to dry. I put the diamond on a straightened out paperclip and suspended that across a small box so the paint could dry without touching anything.
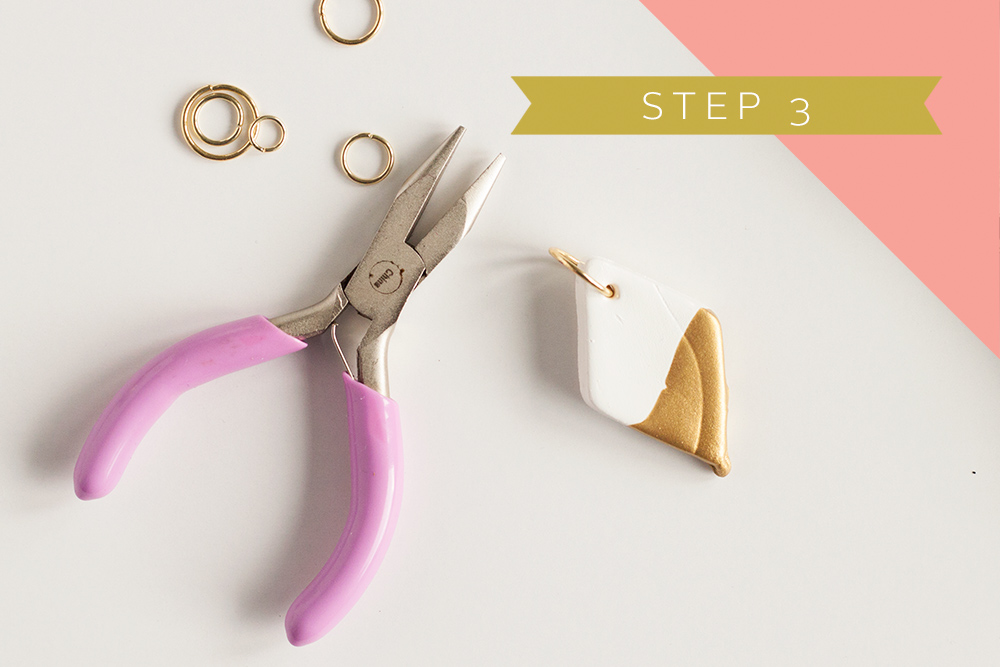
STEP 3
Attach a jump ring that will fit on the diamond, while also leaving enough room for the chain.
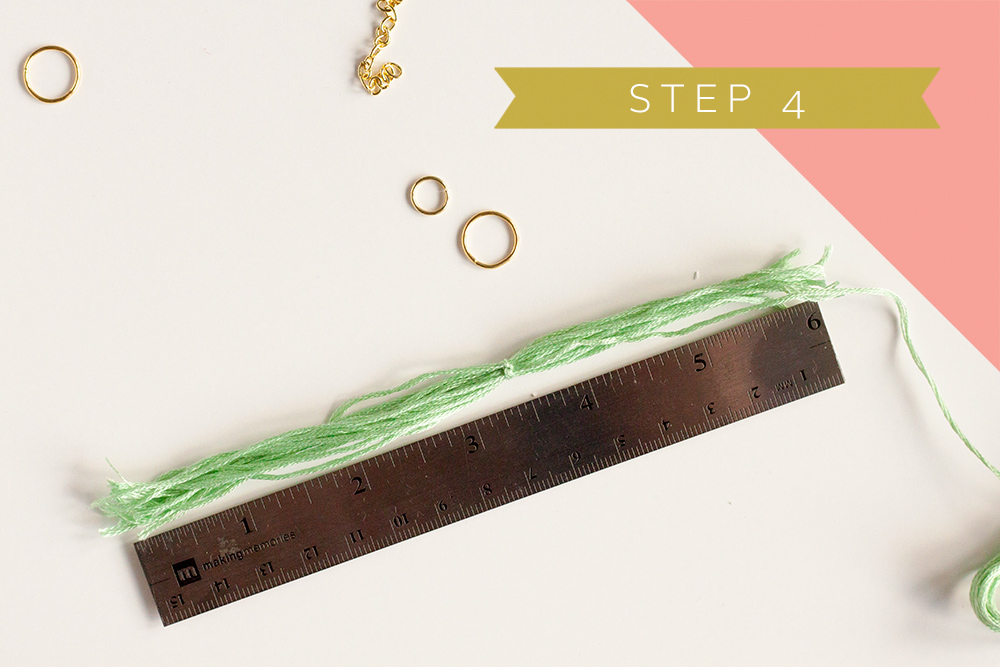
STEP 4
Decide how long you would like your tassel to be. I wanted mine to have a finished length of 3″, so I cut my pieces of floss 6″ long since you will be folding it in half. Using a longer piece of floss (I left mine uncut from the skein), tie it in a knot around the bundle that is slightly off center. This is where you will wrap the floss to make the tassel. Be sure to leave a tail.
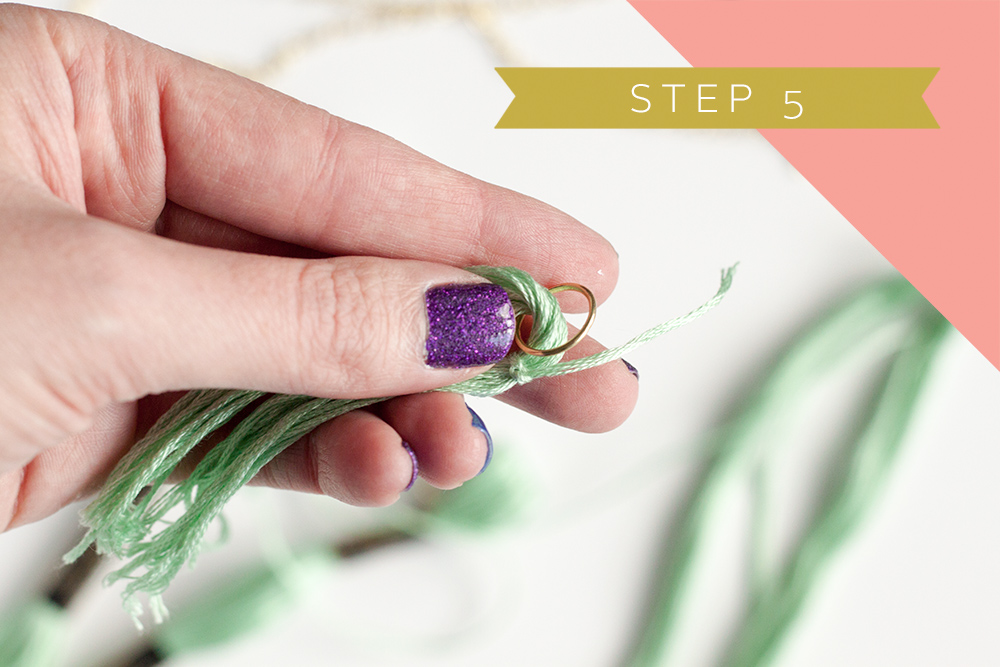
STEP 5
Take another jump ring and thread the bundle of floss through it until you can fold the tassel in half. You can see that the knot is off-center, with a tail. This will be where you start to wrap.
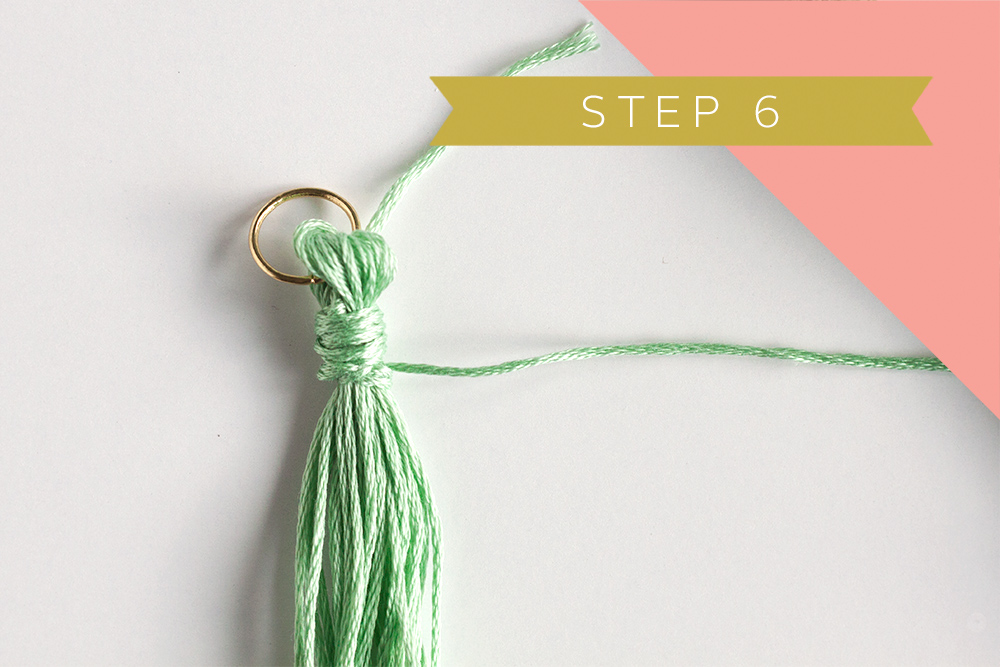
STEP 6
Wrap the floss around the tassel until it looks like this, then cut your floss, leaving at least a 4″ tail. Tie a knot to secure the floss, then using a needle, thread the two loose ends back into the tassel and down the center to hide them. Trim the bottom of your tassel so it is an even length (or not!).
STEP 7
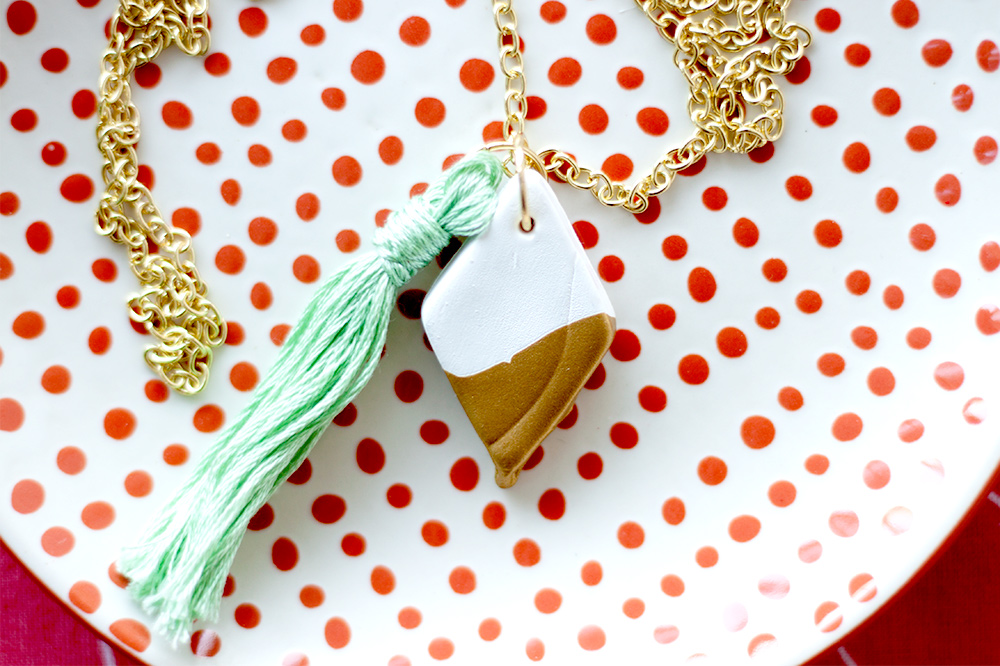
Take your chain that is at your desired length and attached the closure to one end and a jump ring to the other. Add both the diamond and the tassel to your chain by either sliding them on or attaching them to the chain links. Whatever looks best to you! I ended up connecting the tassel and diamond by their jump rings and sliding the chain through the jump ring on the diamond. All done! Now go out and wear your handmade necklace and feel extra fabulous!
If you make this necklace, I’d love to see your creations on Instagram! Just use #peonyandinkDIY and I’ll regram some of my favorites!
One response to “DIY: How to Make a Triangle + Tassel Necklace”
very creative.